


I'm generally very happy with my Nikon D70, but the remote control bugs me. The D70 will only accept an IR wireless remote, and the sensor is on the front of the camera. This means you can't control the camera remotely from behind the camera, and worse: you can't hook the camera to electronic controllers that take automated pictures.
This may be remedied by hacking the remote control. It involves hacking a device with surface-mounted components, and that requires a steady hand and some soldering experience, not to mention a soldering iron with a pointed tip.
Note: what follows is a hack on the Yongnuo ML-L3 replacement remote controller. I suspect a similar approach is possible with the original Nikon ML-L3, but the connector should probably be soldered to different pins on the Nikon remote.
I didn't want to ruin my original Nikon ML-L3 remote control, so instead I purchased a few replacements from Yongnuo that cost only a fraction of Nikon's original remote: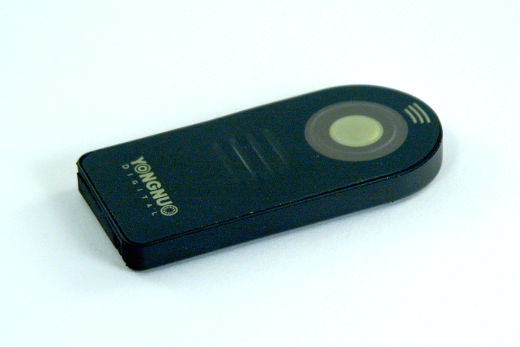 The first step was to open the remote control. The pushbutton front is a thin sheet of metal glued to the circuit board which had to be removed. A hobby knife was all that was required for this operation:
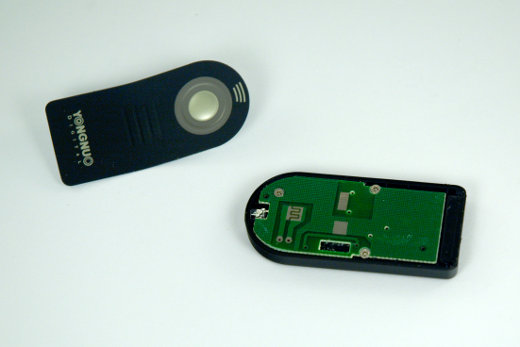 This revealed the pushbutton connectors, and while two thin wires could probably be connected to the two predrilled pads, I went for a different solution where I could add a small connector inside of the remote control. First, I removed the three screws holding the circuit board:
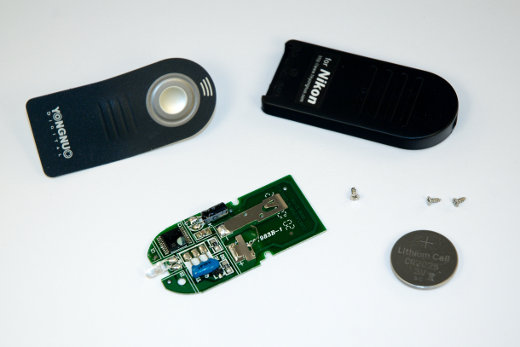 Inspections of the circuit board and measurements with an Ohm-meter revealed that pressing the pushbutton shorts pins 14 and 15 on the integrated circuit found in the upper left corner of the circuit board in the above picture. The next step was to cut a hole for a small connector made out of a straight one-row female header:
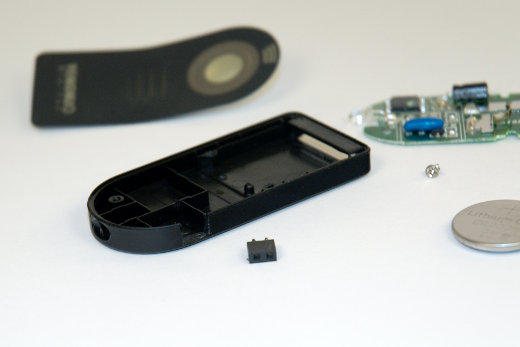 So far, nothing difficult. The next step required careful soldering of two wires to pins 14 and 15 on the surface-mounted integrated circuit. It helped to superglue the connector on top of the circuit first, since this was where it was going to be fastened anyway:
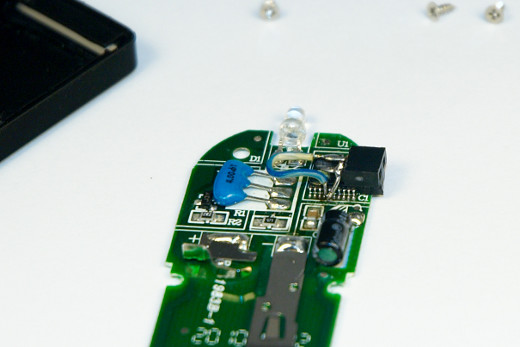 That was it. All that remained was to reassemble the remote control. It turned out the connector was slightly too big for the case so the metal front doesn't quite fit, but I can live with that. It's a learning experience:
The original pushbutton on the remote still works, and the D70 can now be released by pushing a button that is wired to the connector on the remote control. Of course, the remote control still needs to be placed in front of the camera, but Gaffa is always your friend.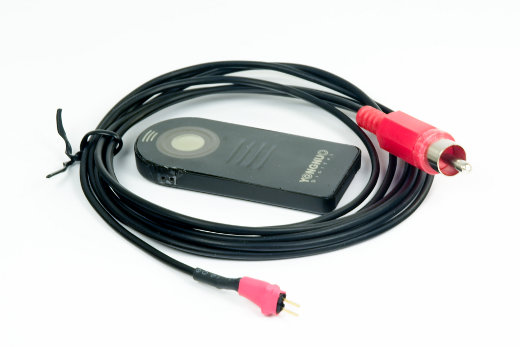
Nikon Wired Remote Control Hack
5 Comments
Leave a comment

Good idea i've done very similar thing as well.
I'm a little puzzled abou that cable in last photo, where do you plug that RCA end of the cable to trigger remote.
Thanks.
The RCA jack is where I connect the button. I could simply have connected a button instead of the RCA jack.
However, I made it so that I could connect any kind of switch to it. One switch is a manually operated switch for wired, manual release. Another one I have is an automated release that triggers electronically. In this case an optocoupler shunts the wire instead of a manual switch.
Hi
Wonder if you could help me with something. I`m busy with the following project http://www.diyphotography.net/create-an-automated-macro-rails-for-image-stacking.
Instead of a wired remote for the canon shutter release (i know ur project is aimed at nikon) i wanted to use an ir remote. I read that the pushbutton connectors are positive (connector) and negative (emitter). What i`m trying to figure out is which of the two wires marked canon on the diagram is connected to the positive and negative lines of the push button (one wire for each). Maybe the shutter wire is connected to the negative line?
Any ideas?
Thanks.
No problem. If you look at the datasheets for the optocoupler 4N25, it basically contains an NPN transistor. This means the emitter goes to negative, that is, pin 4 goes to negative and pin 5 goes to positive. So on the prototype board drawing, it's #22 to negative and #21 to positive.
Thanks :-)